Instagram is where your brand should be in 2022. It’s where most users follow business accounts, demonstrating that there’s plenty of room for your company to obtain followers and engagement.
There is a lot for brands to work with, from stickers to surveys and swipe-up features.
[playht_player width=”100%” height=”175″ voice=”Mark”]
But there is another approach, one that can help your brand to become even more appealing.
AR filters, as they assist in the creation of fascinating and novel ways for your business to be exposed to a larger audience.
Instagram users are extremely interested in custom Instagram filters. AR filters have limitless potential. Instagram AR filters can raise brand awareness by evoking emotions and making your audience one-of-a-kind.
In this article, you will learn about how to make your own Instagram filter and the benefits of utilizing Instagram AR filters as well as how to make your own Instagram AR filters.
What exactly are Instagram AR filters?
Augmented reality (AR) filters are computer-generated effects that are placed on real-world photographs.
AR filters interact with your camera to add a layer or graphics to the foreground or background of your shot.
There’s a strong possibility you’ve come into contact with an AR filter on Instagram in some form.
Consider Instagram’s facial filters. The puppy filter, for example, superimposes a dog’s ears and nose on top of your image. Those computerized effects follow you around as you move.
Or its “In 2022, I will be…” filter, which superimposes a dialogue box above your face and displays the answer after shuffling the options on the screen.
Keep in mind that Instagram AR filters are not the same as the preset filters. Instagram’s preset filters improve the quality of images with a single click while AR filters are an interactive element for stories and reels.
Facebook revealed at its F8 conference in May 2019 that anybody may create custom AR filters using its Spark AR Studio platform. Users can use this new platform to create unique augmented reality effects for Instagram Stories, Instagram Reels, Facebook Stories, Messenger, and Portal.
Instagram users can easily find these filters. Anyone who visits your brand’s Instagram page can use the new face icon.
Instagram AR filters can help you in increasing brand awareness by evoking emotions giving your audience an experience via AR filters.
While AR filters may not be ideal for all businesses, it is still a good option to reach a wider and younger audience.
Custom AR filters not only exhibit your business’s individuality but also reflect the general tone of your brand and add to its originality, allowing you to stand out from the crowd.
What is a Spark AR Studio you ask?
Spark AR Studio allows you to personalize photographs and videos for both Facebook and Instagram. While designing your own AR filters may appear to be a difficult task, Spark AR Studio was designed to make the process simple.
Visual programming allows you to add interactive components, animate things you create, and create logic based on how your item should react in reaction to interactions with it. Spark AR Studio also lets you design your own textures and materials for usage in your environment.
Creating your own Instagram AR Filter necessitates the addition of items to your canvas. You may use Spark AR Studio to upload your own sound files and 3D objects, which can then be edited to provide the desired look, feel, and interactivity.
If you’re new to AR filter design, Spark AR Studio provides a free collection of objects to get you started. All of these high-fidelity models are available thanks to a collaboration between the social media giant and Sketchfab.
Instagram AR filters increase the usefulness of your filters by adding effects that can be applied to faces so that users have a more engaging experience.
Because Spark AR Studio allows you to add logic to filters, you can program yours to react to movements on a subject’s face.
How to Make Your Own Instagram AR Filter?
How to create your own filter on Instagram? Making your first Instagram AR filter will require you to master a few new concepts and vocabulary, but nothing too difficult. Though it’s not as easy as using a unique WordPress theme for your website, here’s a step-by-step guide to getting started on your own.
Step 1: Download Spark AR
Give Spark AR Studio a shot; it might work.
Spark AR Studio is a simple platform for creating custom filters and effects. It is available for Mac and Windows.

Creators can use Spark AR to use their library of AR assets, build with or without code, import objects, and sounds, and publish and track performance across Facebook and Instagram.
Step 2: Acquaint Yourself With The Platform
Once installed, we recommend that you spend some time going through a few tutorials to become acquainted with the platform. A friendly introductory tour is included with Spark AR Studio. It lasts five minutes and will help you become acquainted with the majority of the platform’s features.
What’s next about how to make your own IG filter?
Then, go through the tutorials in the Learning Centre to familiarise yourself with the program’s interface. When you’re ready to begin, decide whether you’ll build a filter from scratch or use one of the eight templates.

If you require additional assistance, go to the learning center, where you can find a selection of tutorials.
The Getting Started section contains fundamentals that will help you rapidly become acquainted with Spark AR Studio’s capabilities and navigation.
It also has instructions on how to create a face tracking effect, preview Spark AR Studio effects, use face reference assets, use templates, features and procedures, effect lifecycle, policy, and more.
Step 3: Add Your Object
To begin, select a project and you’ll be sent to a canvas, commonly known as the Viewport, with your object placeholder preset.
The Viewport may appear to be a difficult canvas, but if you get stuck, remember to consult the tutorials area for instructions on how to utilize each function.
In the Viewport, you’ll have to add an object. You can either import one or browse Spark AR Studio’s ever-expanding catalog of objects. To import an item, use the AR Library.
To proceed, go to the main menu (top left of the application) and select File, then Import from AR Library.
A new window will pop up with a number of options. From the left-hand menu, choose 3D Objects.
When you’ve discovered your object, select it and click the Import Free button.
Because Facebook makes use of Sketchfab’s asset collection, you’ll need to create a Sketchfab account or connect using your Facebook, Google, or Twitter account.
You can also choose from free audio files, animations, and other resources in the AR Library.
Step 4: Add Effects To Make It Stand Out
Now that your object is in the Viewport, you can add effects to it. These will have to do with how your object responds to user interaction.
Adding objects, additional effects, and textures can make your filter stand out.
You must prepare Photoshop files if you want to produce anything unique other than the usual materials accessible in the application. Before importing, convert files to png format.
Effects involve how your object moves and looks when positioned at various angles in real life.

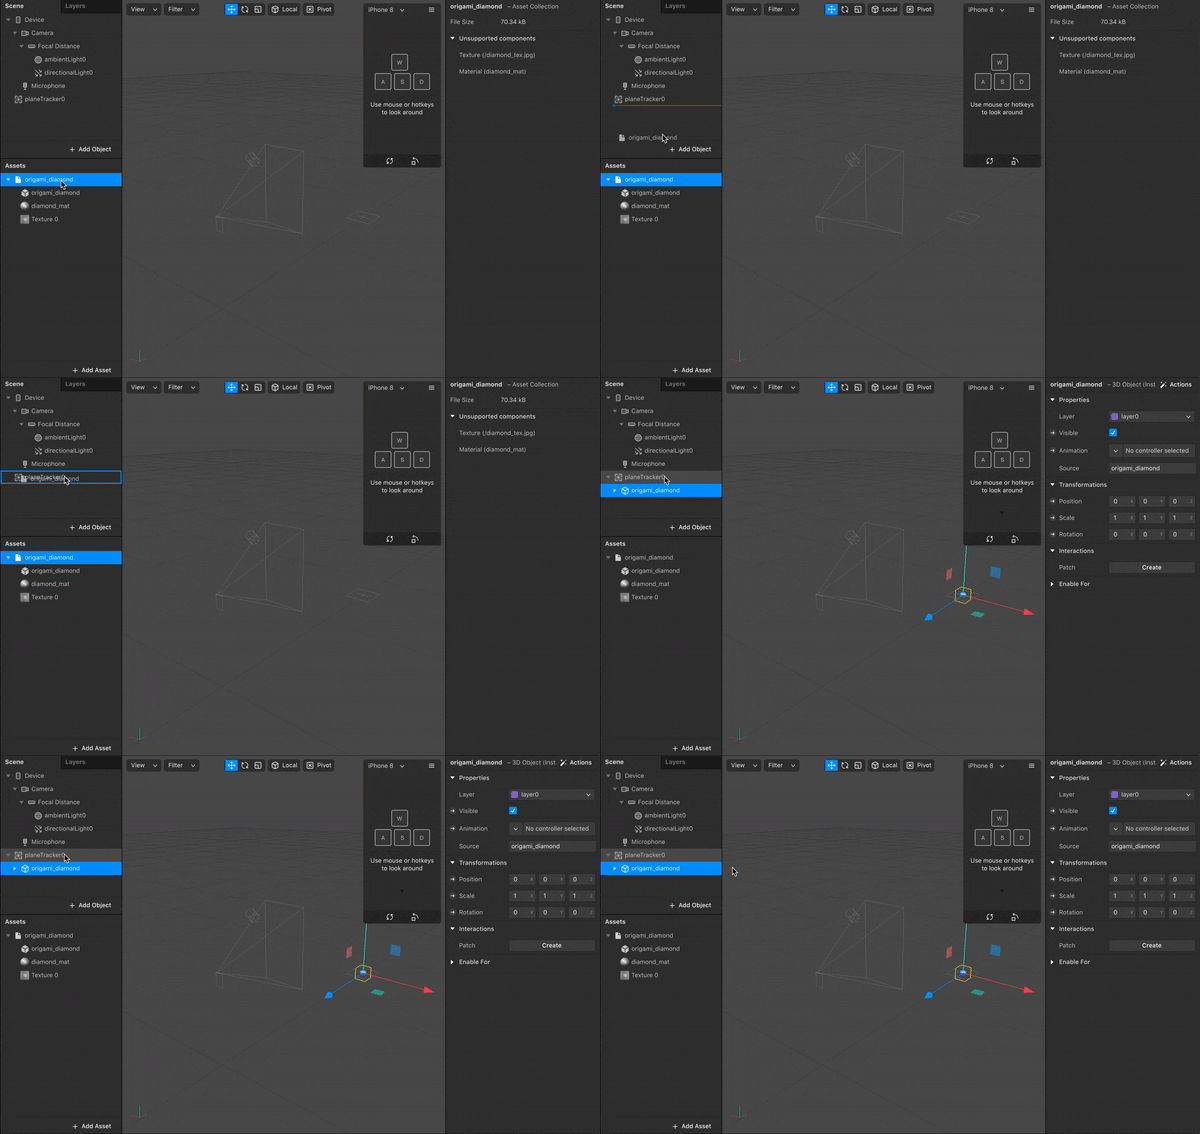
Simply drag objects from the Assets panel into the Scene panel to position them in your scene. This will result in the creation of an instance of the object.
You can begin changing the color of the object after it is in place; there are several ways to do so. You may:
- Change the directional light to add depth and realism to a 3D object.
- Enabling and disabling appearance on the front, back, or both cameras.
- Modify your object’s animation.
- Add extra effects, such as new animations, textures, and materials.
Step 5: Test Your Effects
Send your test file to Instagram or Facebook to put your new AR filter to the test. This will demonstrate how your filter will appear on each platform.
Send your test file to Instagram or Facebook to see how it looks in Instagram or Facebook Stories.
Then, to see how your effect looks in the camera, send it to Facebook or Instagram camera.
First, click the ‘Test on device’ icon in the toolbar and then click ‘Send’ to the right of Instagram or Facebook.

You’ll receive a notification on Facebook or Instagram inviting you to try out the effect in the camera.
You may also use the Spark AR Player app to test and replicate your effect.
When you’re ready to replicate your effect, connect the wire from your mobile device to your computer. On your device, launch the Spark AR Player app.
Click the ‘Test on Device’ icon in the toolbar of Spark AR Studio. Your connected device will be listed under Preview in Spark AR Player. Click the Send button.
The effect should now be visible on the device. Before submitting an effect to Spark Hub, it’s a good idea to test it on as many different types of devices as possible using Spark AR Player.
Step 6: Now Your Effect Is Ready To Be Published
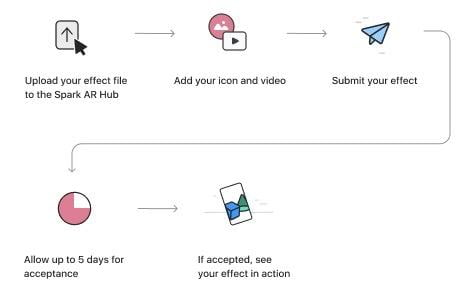
After you’ve completed evaluating and testing your effect, it’s time to submit it on Spark AR Hub. When you’re ready, hit the “upload” icon in the app’s bottom left-hand corner.
You must first export and submit an effect before you can publish it. When you’re finished, you’ll be in the Spark AR Hub.

To finish the publishing process, simply follow the on-screen directions like,
- Selecting a name for your effect
- If you haven’t previously done so, submit your export file from Spark AR Studio.
- Selecting a platform, an owner, and a publisher.
- Choosing categories and keywords
- Add your demonstration video and icon.
- Selecting a publishing date.
- Waiting for your impact to be accepted once you’ve submitted it.
Remember that your new effect will not be available right away. First, your creation will be evaluated to ensure that it complies with Spark AR’s policies and guidelines. This review procedure could take as little as a few days or as long as a week.
Creating Your Own Instagram AR Filter
AR is amongst the strongest digital marketing trends in recent times. Instagram AR Filters are an excellent approach for marketers to create interactive content in order to stay top-of-mind with their target customers.
Because your filters are compatible with Facebook and Instagram, you have access to a big audience of people who enjoy personalizing their posts and stories, which means more exposure for your company.
You’ll quickly discover how to work with the platform’s various templates—or how to create an AR filter on a blank canvas—as you become more familiar with it. Spark AR is a useful feature that really isn’t very user-friendly, but it stands out for the numerous options it provides for those looking how to create Instagram filter and can launch a plethora of experiences with a little ingenuity and modification.
Instagram filters are becoming increasingly popular and will be in high demand for a long time. As a result, keep up with the latest trends and create some incredible Instagram AR filters.
There’s a lot of content out there for you to explore and experiment with; all you have to do is invest the time and play with it. Are you ready to create your own AR filter?

