- Go to https://developer.twitter.com/en/portal/projects-and-apps and click on “create project” – be sure to click the tiny link that says “sign up for a free account”
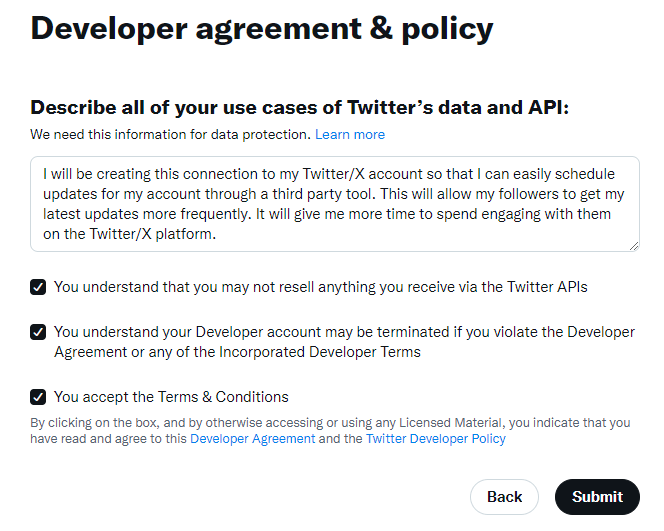
- Next enter something like this in their agreement (tweak to your needs):
- I will be creating this connection to my Twitter/X account so that I can easily schedule updates for my account through a third party tool. This will allow my followers to get my latest updates more frequently. It will give me more time to spend engaging with them on the Twitter/X platform.
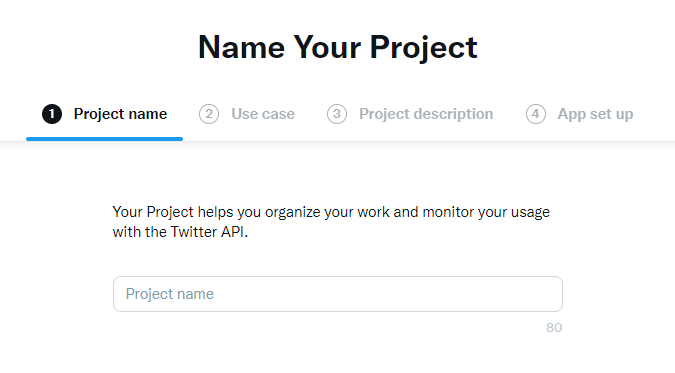
- On the following screen enter a name for your project and then click “next”.

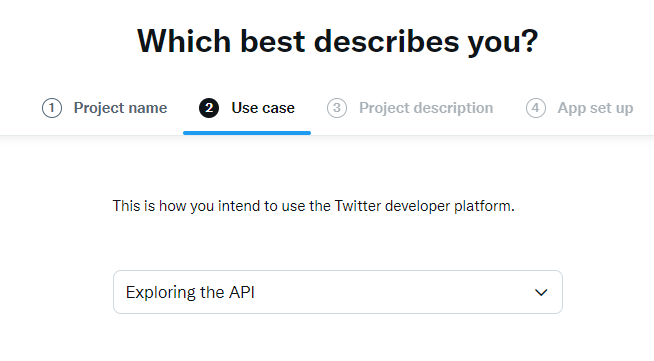
- Next, on the “use case” step, select “Exploring the API” from the dropdown and click “next”.

- Then for the project description step, type in whatever you want here.
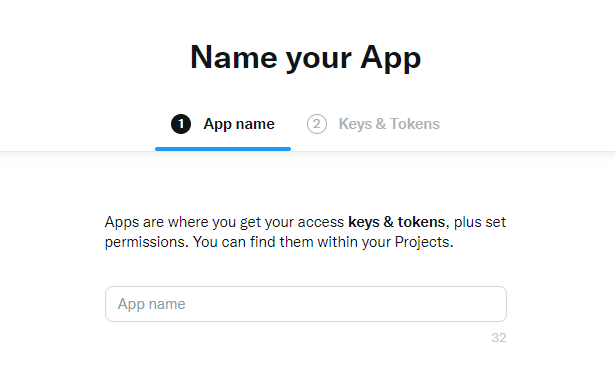
- Next, give your app a name.

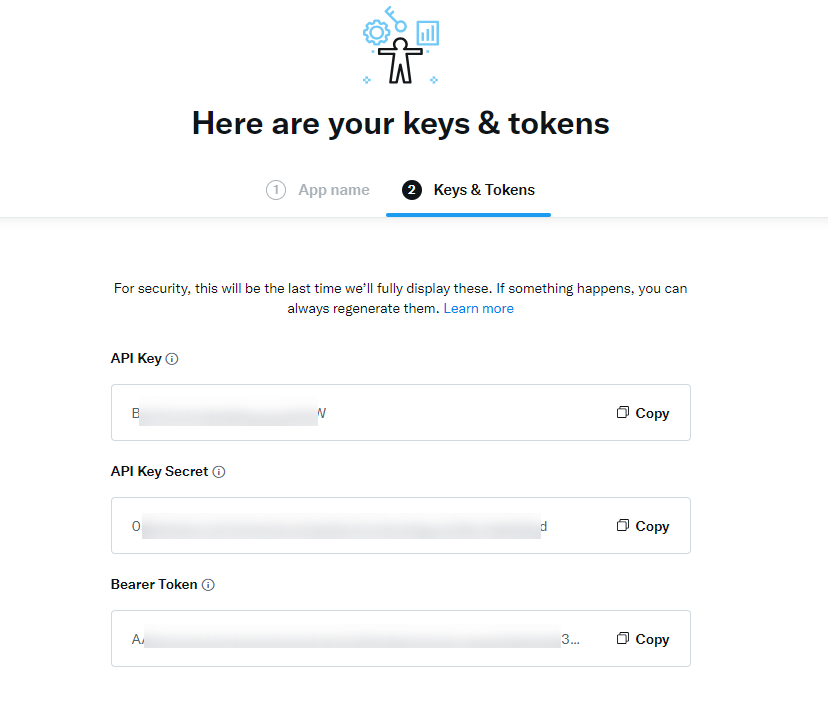
- On the following screen be sure to copy the keys and tokens, you will need these for setting up Twitter/X on Bulkly.

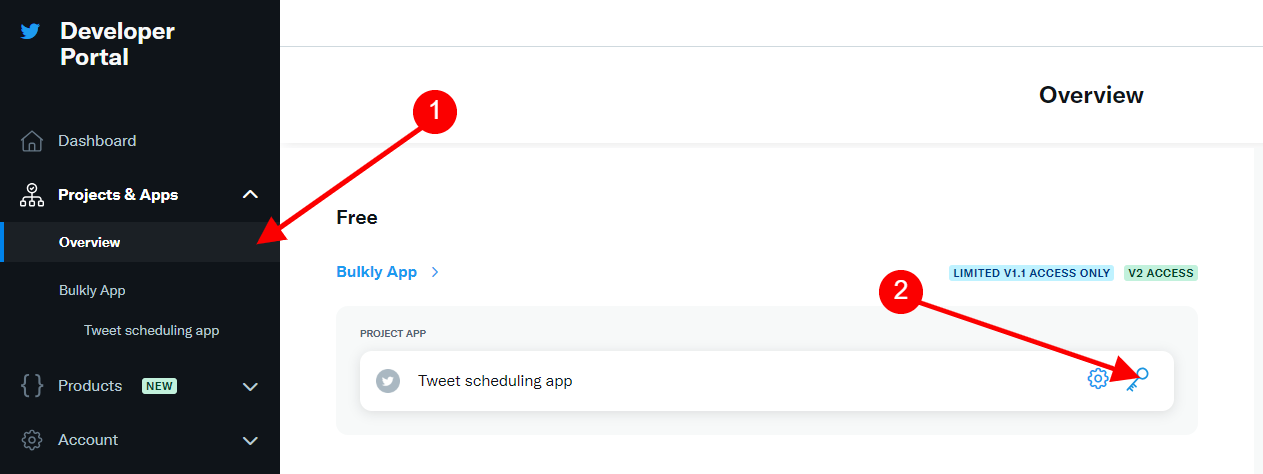
- Next, click on the “overview” link in the left sidebar, then click on the “keys & tokens” icon.

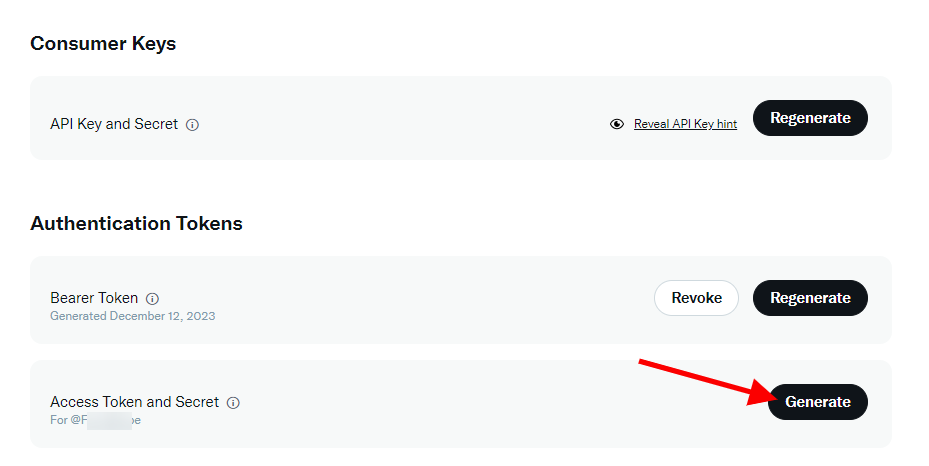
- Click on the “generate” button in the “Access Token and Secret” section.

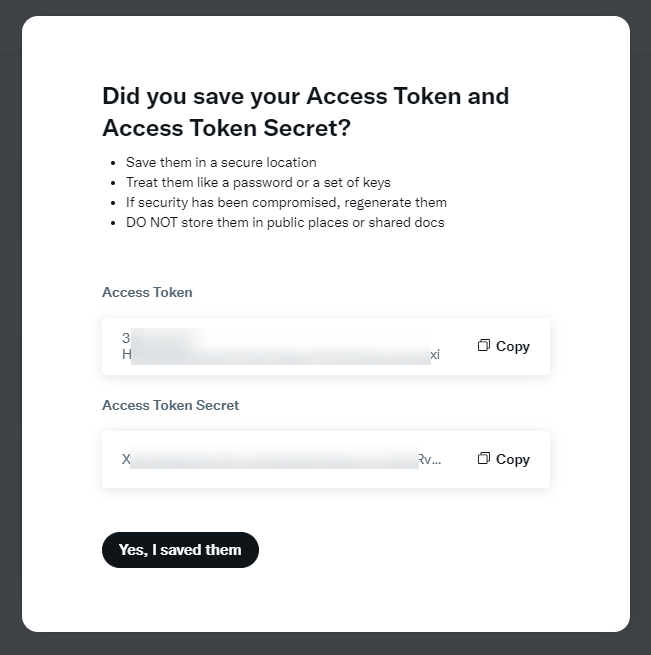
- An overlay will appear with your access token and secret. Be sure to save this information with the previous information you have saved to input in Bulkly.

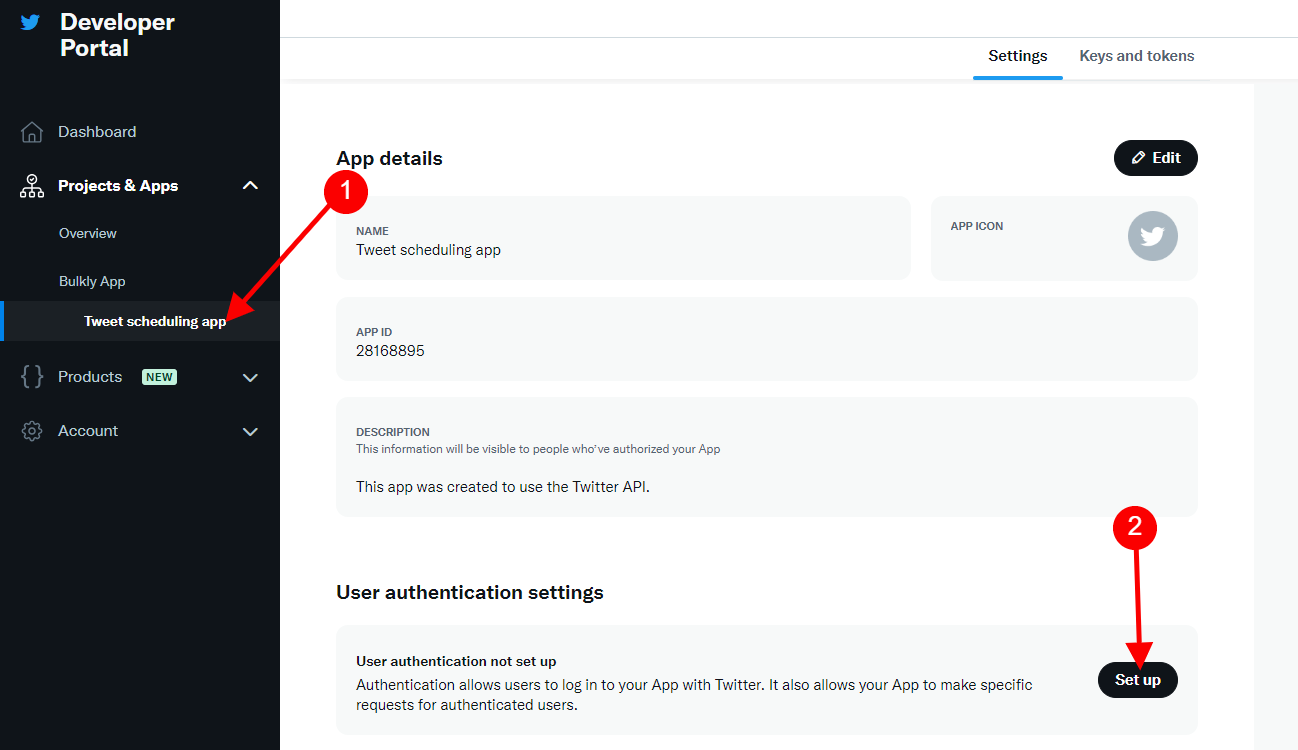
- Next, click on your app name in the left hand sidebar. Then click on “setup” under the “User Authentication Settings”.

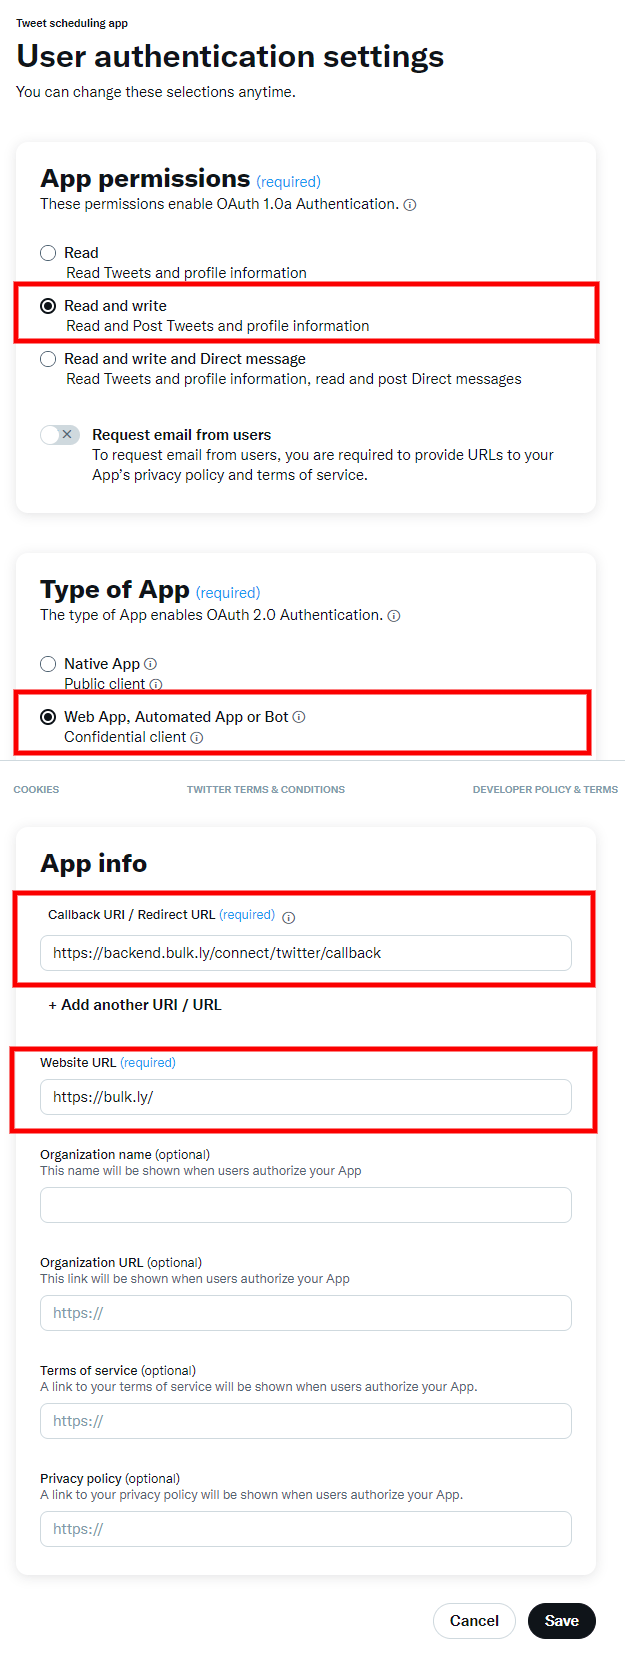
- On the following screen, select or enter the following:
- App permissions – select “Read and write”
- Type of App – select “Web App, Automated App or Bot”
- Callback URI / Redirect URL = https://api.bulk.ly/connect/twitter/callback
- Website URL = https://bulk.ly
- Click save

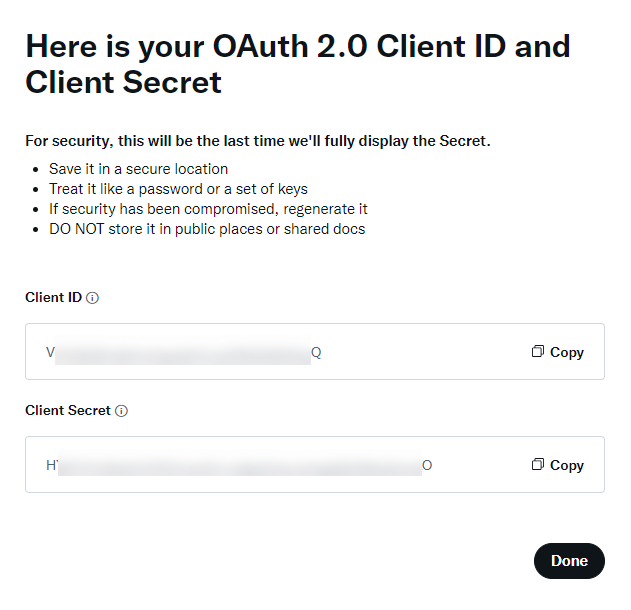
- You will then see an overlay with your On the following screen you will see your keys for “Client ID” and “Client Secret”. Save these with your other keys you have saved.

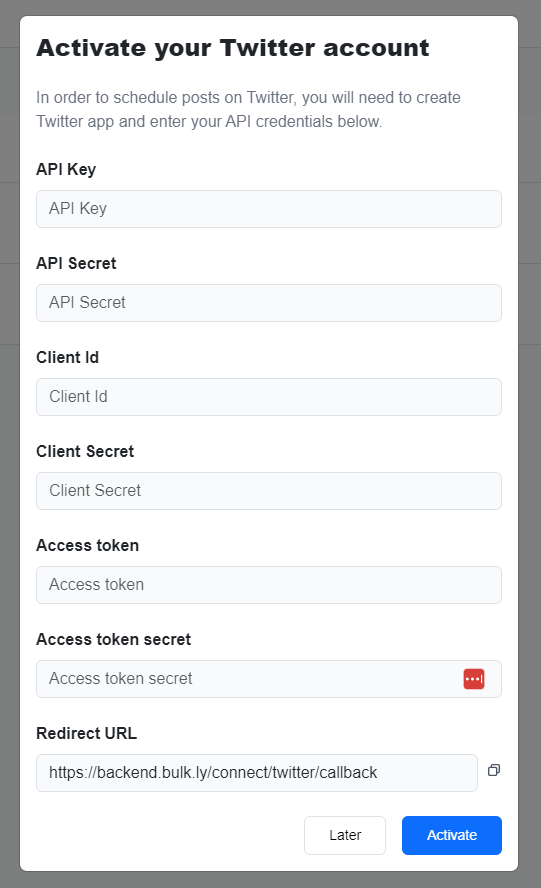
- Next go back to Bulkly and click on the “Social Accounts” link in the left navigation, then click on “add social account” and select Twitter. In the overlay, enter all of the keys you saved from the previous steps and save.

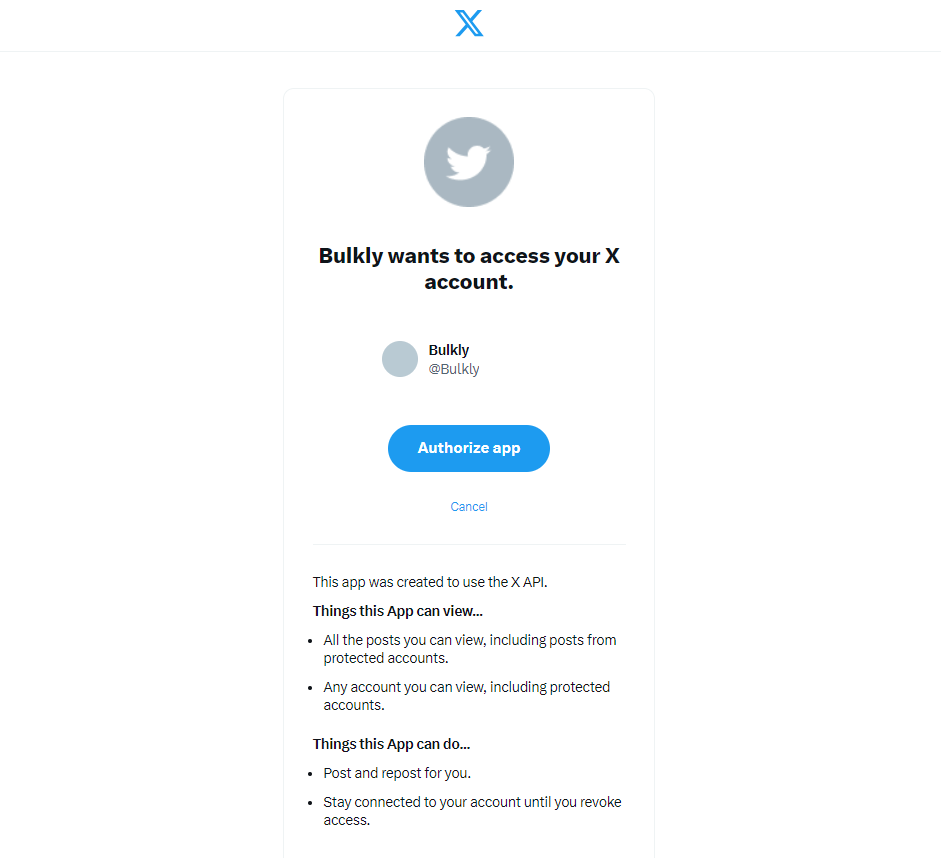
- Then, click on “Add Social” in Bulkly and connect it to Twitter to authorize the app.
- Once Twitter sends you back to Bulkly, select your Twitter account in the overlay to add it.
- Now you can schedule posts to your Twitter account. Please note that you will need to do this for all Twitter accounts you want to schedule posts to.
