For me, staying organized helps me to keep somewhat of an order with all my various initiatives.
Could I be more organized?
No doubt.
Take for example, my computer desktop. It’s a disaster. But I know where the important things are and how to get to them.
For anyone else, my desktop might drive them a bit insane.
But when it comes to my social media updates, my organization is solid. And depending on who you ask, I’ve been told I’m a genius.
Of course, I am far from being a genius – but hey, I’ll take the compliment.
However, I will say that I’m pleased with how I can organize my social media posts.
Especially since I am posting to multiple accounts on multiple channels. These channels typically require their own schedule and types of content that need to be shared.
Today, I’m going to show you how to organize your social media updates even if you aren’t a genius. I’ll cover:
- Why it’s important to organize your social media updates
- What you need to do to organize your social media posts
- Different ways you can use organization to be more strategic with your status updates
Ready to get organized?
Why it’s Important to Organize Your Social Media Updates
There are countless social media tools that allow you to schedule status updates. But that’s about all they do.
You can schedule (dump in) all your updates, pick your times to post and leave it at that.
That works just fine if you are automating one specific post type. For example, resharing your evergreen blog content.
But what if you want to be more strategic and share different types of status updates?
Not only that, but each of those different status updates need to post more or less frequently than others. To different accounts.
Your head might have just exploded thinking about it.
Not to worry, later I will show you how to make this an easy and straight-forward process.
Without organization it wouldn’t be possible to do something like this…
Well it might be possible, but it wouldn’t be easy and would probably involve you wanting to toss your computer out the window.
And when you take control and are organized with your social media approach, it makes it easier to get more strategic with the posts for your social media accounts.
So how can you organize your social media accounts?
What You Need to Do to Organize Your Social Media Posts
To stay on top of your social media organization game, you will need two things:
- Buffer
- Bulkly
Buffer is one of the most well known social media scheduling services. It has millions of users.
With just a Buffer account you can manually add content to your account. This is somewhat tedious and very time consuming.
Bulkly is a service that helps drip social media updates to your Buffer account, automatically.
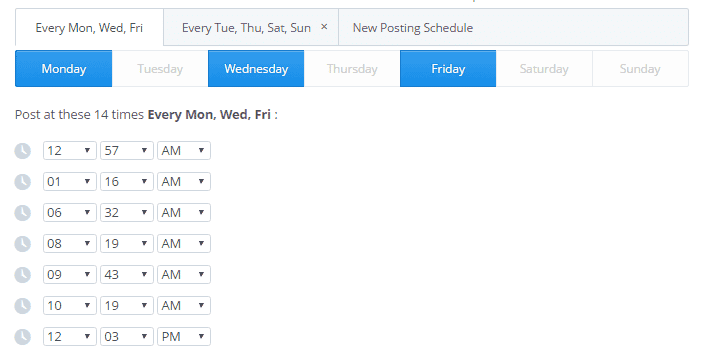
In your Buffer account you can connect multiple social media profiles. And for each of these profiles you can create custom schedules of when to post your social media updates.
Depending on the social network, you might want to post more or less than another. If you are not sure when to post, Buffer can help figure this out for you. Simply tell Buffer how many times a day you want to post and they’ll tell you.
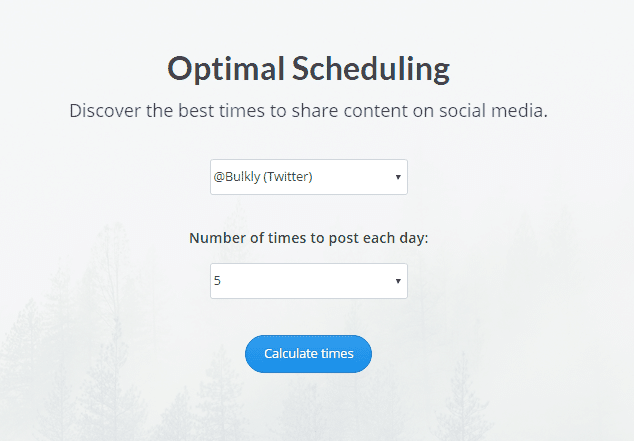
First, you’ll need to click on the “Optimal Timing Tool” link at the bottom of your schedule page in Buffer. From there, you’ll be taken to this:
Here you can select not only the account you want to find the best posting times for, but also how many times per day you want to post. When ready, click on the “Calculate times” button.
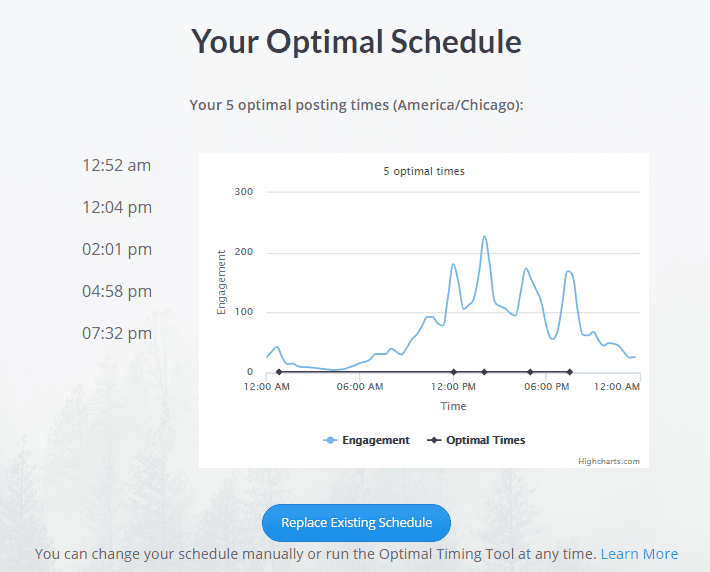
You’ll be presented with the best times to post for that social media account. If you are cool with the suggestions, click on the “Replace Existing Schedule” link and you’re set.
If you are interested in Twitter only, another option is this to find the best time to tweet.
As you can see, Buffer is awesome for scheduling and sharing your social media updates.
But adding content manually isn’t exactly ideal for most startups or entrepreneurs.
That’s where Bulkly comes in.
[yellowbox]Want to organize and automate your social media posts in Buffer? Be the first to know when Bulkly is ready Click here to be notified. [/yellowbox]
You will need to connect your Buffer account to Bulkly in order to get around continuously manually adding content to your various Buffer queues.
But once connected you will be able to automate the adding of social media updates through:
- Content Upload – the ability to upload a CSV of hundreds of status updates in just a few clicks. If you aren’t sure what a CSV is, it’s basically just a Microsoft Excel file type.
- Content Curation – this option allows you to import the content of dozens of RSS feeds. You will be able to review all imported content (and delete what you don’t want) and send it to yourun Buffer accounts.
- RSS Automation – using this will allow you to automatically populate your Buffer queues with various content from your favorite RSS feeds.
But perhaps most importantly, Bulkly allows you to organize your various social media updates into groups.
Here’s how it works.
Each time you add a content source to Bulkly, you can assign it to a group.
Think of groups as different “buckets” for your social media updates. Within these groups you can configure things like how often should Bulkly send an update to your Buffer account. You have the option of selecting multiple times per day, week or month.
On top of that you can have Bulkly endlessly resend (repeat) the posts to Buffer. Bulkly can send in order, starting at the top and working down the list. Or, Bulkly can “shuffle” the updates and pick one at random each time it needs to send a social update to your Buffer account.
Within your group, you can assign hashtags that are specific to the social channel the update will be posted to. For example, you can use different hashtags for each channel if you would like.
Finally, each group can send to one, some, or all of your social media accounts that are connected to Buffer.
Let’s take a look and see how you can use this organization to your advantage.
[yellowbox]Want to organize and automate your social media posts in Buffer? Be the first to know when Bulkly is ready Click here to be notified. [/yellowbox]
Different Ways to Use Organization to Be More Strategic With Status Updates
If you have ever tried to be strategic with your social media updates, chances are it probably revolved around some sort of social media calendar. You know, the really robotic social media approach of something like:
[perfectpullquote align=”full” cite=”” link=”” color=”” class=”” size=””]Every Monday at 10:00 am, tweet an inspirational quote. Then at 12:00 pm, tweet something about signing up for my newsletter…and so on.[/perfectpullquote]
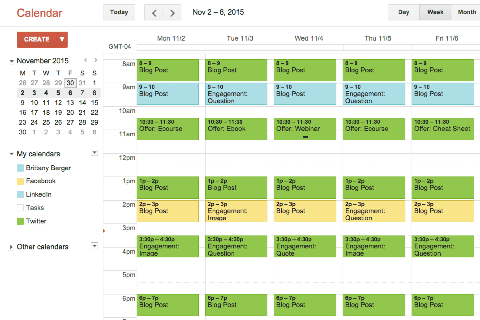
While this approach can and does work, I feel that many make it more complicated than it needs to be.
What if your approach was something like:
- Post links to my blog posts 2-3 times a day
- Share an inspirational quote 1-2 times a day
- Promote my webinar 2-3 times a day
- Share the content of others 5-6 times a day
Where the time slot each of these fall into doesn’t particularly matter? Remember, in the previous section you set up your posting schedule in Buffer.
What’s important is that you can easily create an idea of what type of content you want to share and how many times a day to do it.
And when you use the grouping approach in Bulkly to manage this, it not only becomes clear – but you can even set this up so that it runs on its own automatically.
That’s right. Your different groups will post however many times a day you want on autopilot.
[yellowbox]Want to organize and automate your social media posts in Buffer? Be the first to know when Bulkly is ready Click here to be notified. [/yellowbox]
Let me show you how this works.
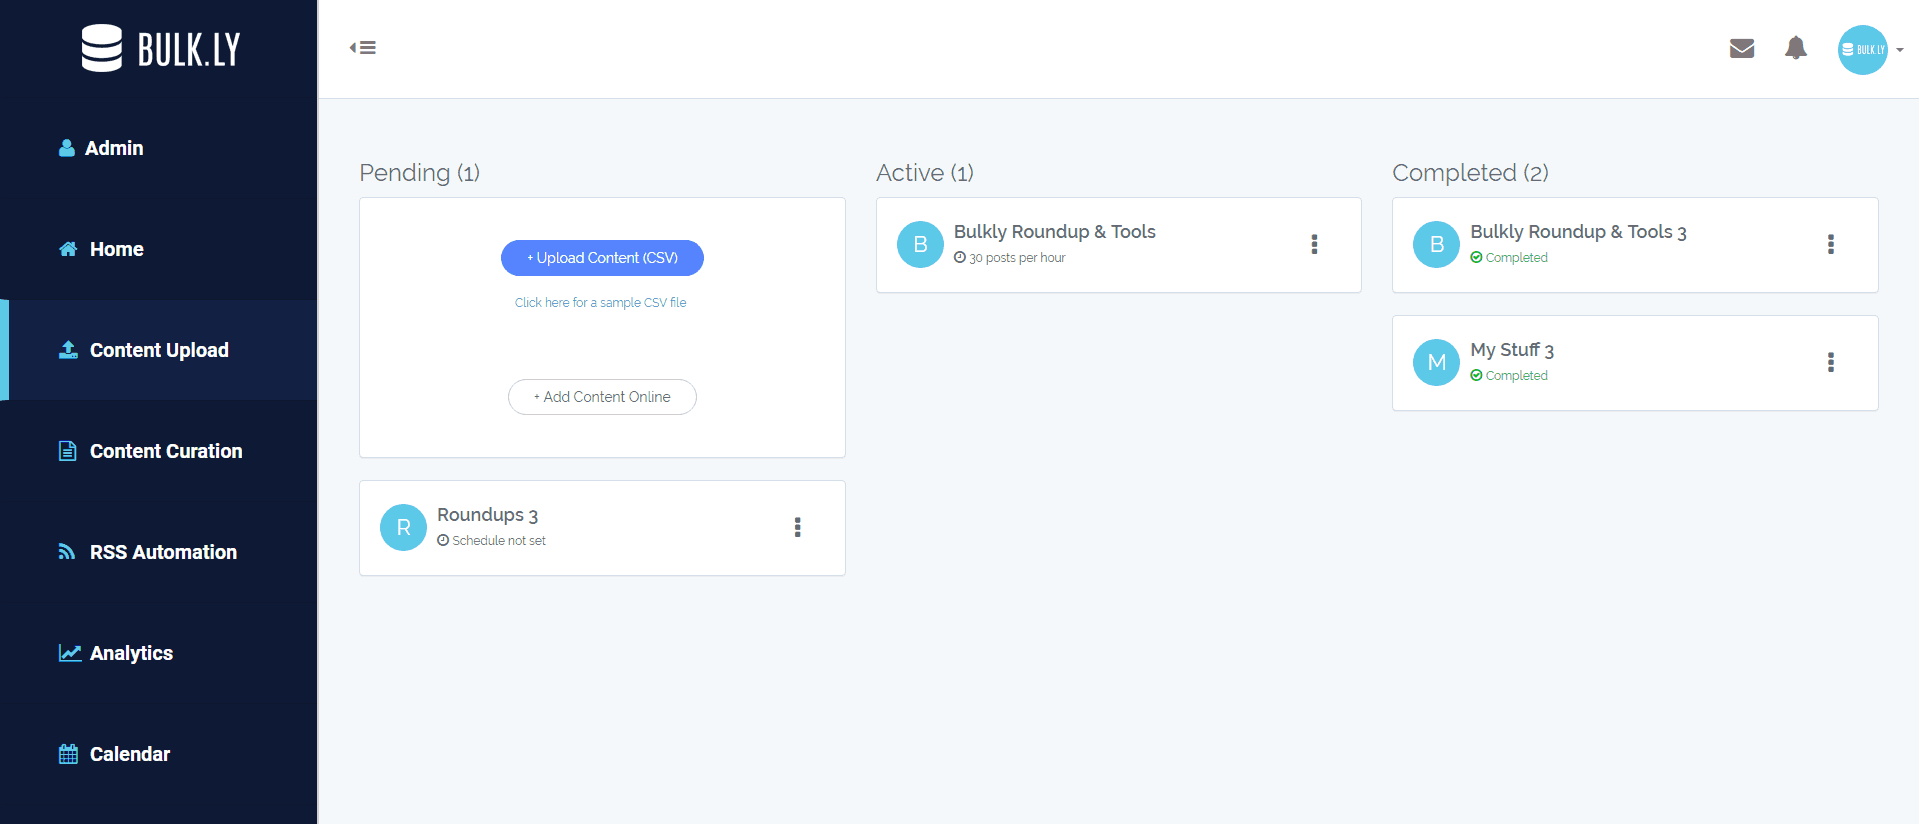
Once logged into your Bulkly account, you will have 3 different options to drip content to your Buffer account. Using the grouping types I outlined above, you’ll want to use the “Content Upload” option for posting links to your blog posts, sharing inspirational quotes, or promoting your webinar.
The “Content Upload” option allows you to bulk add social media updates that you want to send to Buffer. This can be done by uploading a CSV file to Bulkly (a CSV is just an Excel file type) or you can create your updates online through the Bulkly interface.
Once you have clicked on the “Content Upload” button, you will get two options:
- Upload Content (CSV)
- Add Content Online
For the purpose of this, I’m going to use the “Upload Content (CSV)” option. But before I can upload my file, I need to create it. You can download a template file by clicking on the “Click here for a sample CSV file” link in the Content Upload overview page.
Once downloaded, open it up in Excel.
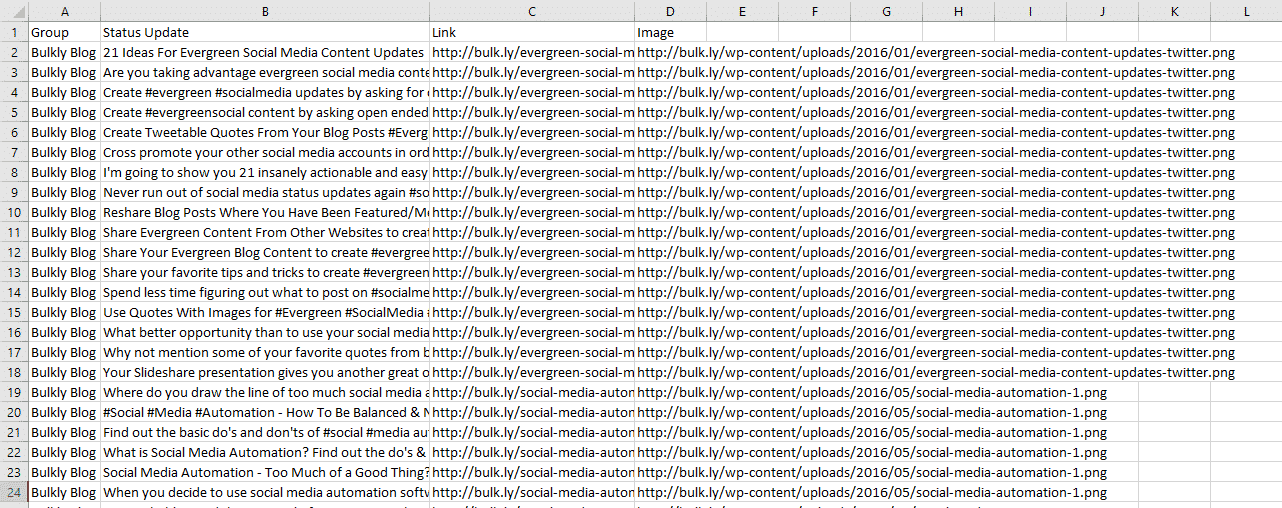
You’ll notice there are four columns:
- Column A – This is for your group name. Any row that has this group name will be grouped together
- Column B – In this column you will enter your social media update
- Column C – This optional column is for you to enter a URL you would like to attach to the status update
- Column D – If you want to natively attach an image to your social media update, enter the full URL of the image here. It will be attached to your update on networks that support it
So going back to our example, let’s say I needed to create groups for:
- My blog posts
- Inspirational quotes
- Webinar promotion
In Column A, I would use these names when the social media update in Column B should be part of a particular group.
Your CSV file would look kind of like this:
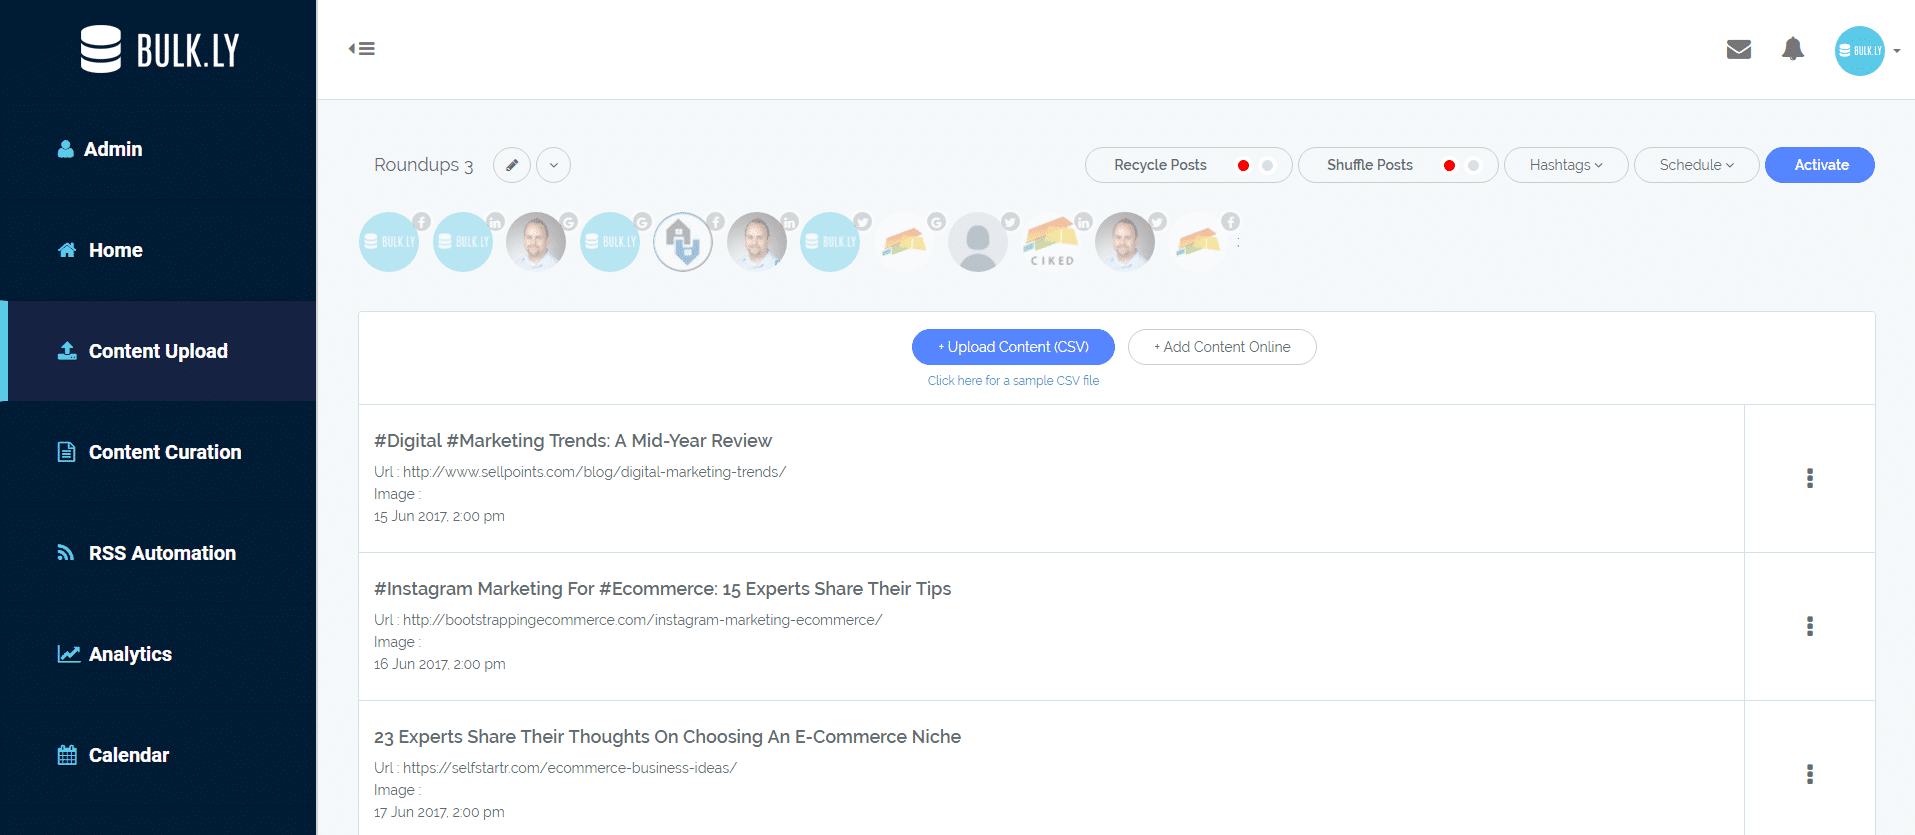
Once your file is ready, save it and then go to your Bulkly dashboard and click on “Content Upload” then on “Upload Content (CSV).” Browse for your file and within a few seconds all of your social media updates will be imported into Bulkly.
From here you can click any of the items to make edits if you need to. Or, if you decide you don’t want to use something as an update simply delete it from the group.
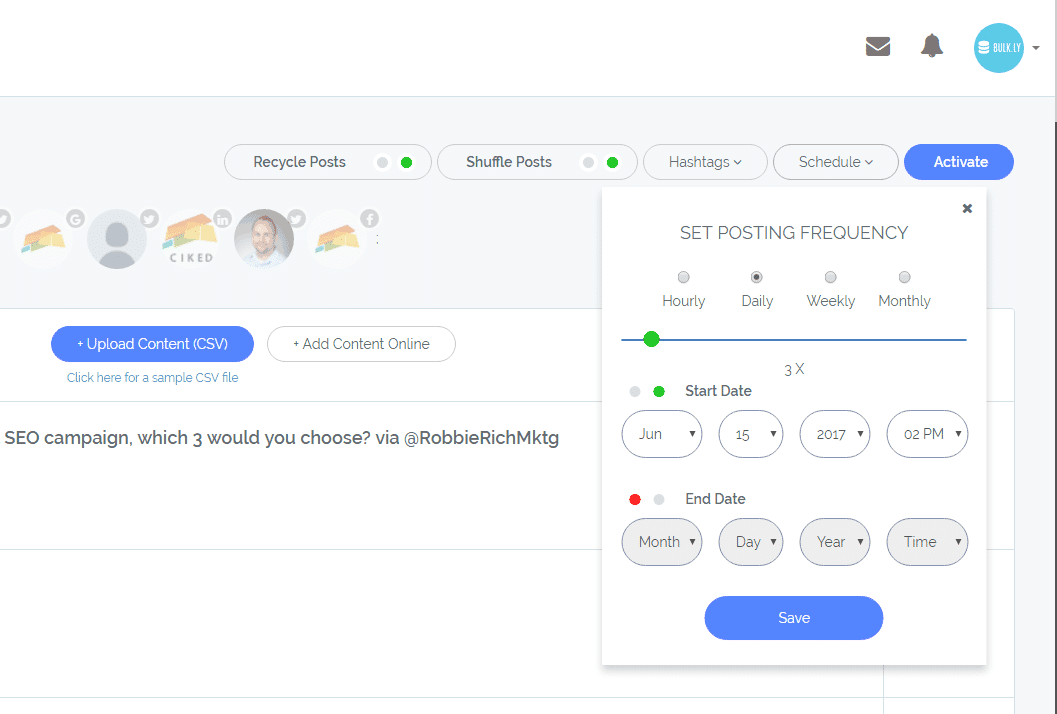
When you are ready, you’ll need to choose the posting settings for this group.
If you want to have Bulkly continuously drip social media updates from this group to your Buffer account, you will need to be sure to select the “Repeat these posts” option.
Under the schedule drop down, choose “Daily” and select the number “3” on the slider. If you want to start posting right away, leave the start date as-is and save. This will tell Bulkly to send content to Buffer for this group 3 times a day, or roughly once every 8 hours. If you want to stop sending these posts at a certain date, then enable the “end date” option and choose a day and time.
If you want to use your social updates in a random order, select the “Shuffle Posts” option as it will randomly select an update to send instead of going down your list in order.
If you would like, you can enter hashtags to be used on a specific social media channel.
Last, you need to select which social media accounts you want to send these updates to. You can pick one, some or all listed accounts.
When ready, click on the “Activate” button and you are set. Within a few hours you should see content start to be dripped into the next available slot for each social media account you selected.
[yellowbox]Want to organize and automate your social media posts in Buffer? Be the first to know when Bulkly is ready Click here to be notified. [/yellowbox]
When it comes to sharing other people’s content, I find it best to use the “RSS Automation” option in Bulkly.
What you will need is a list of RSS feeds of your favorite sites or people to share content from. I’ve previously covered how to find RSS feeds in this post.
Once you are armed with a list of feeds, go to your Bulkly dashboard and click on the “RSS Automation” button. Just like the “Content Upload”, you will have the same two options to add content.
If you want to use a CSV, you can download a template file.
For this example, I will use the online interface to add some RSS feeds.
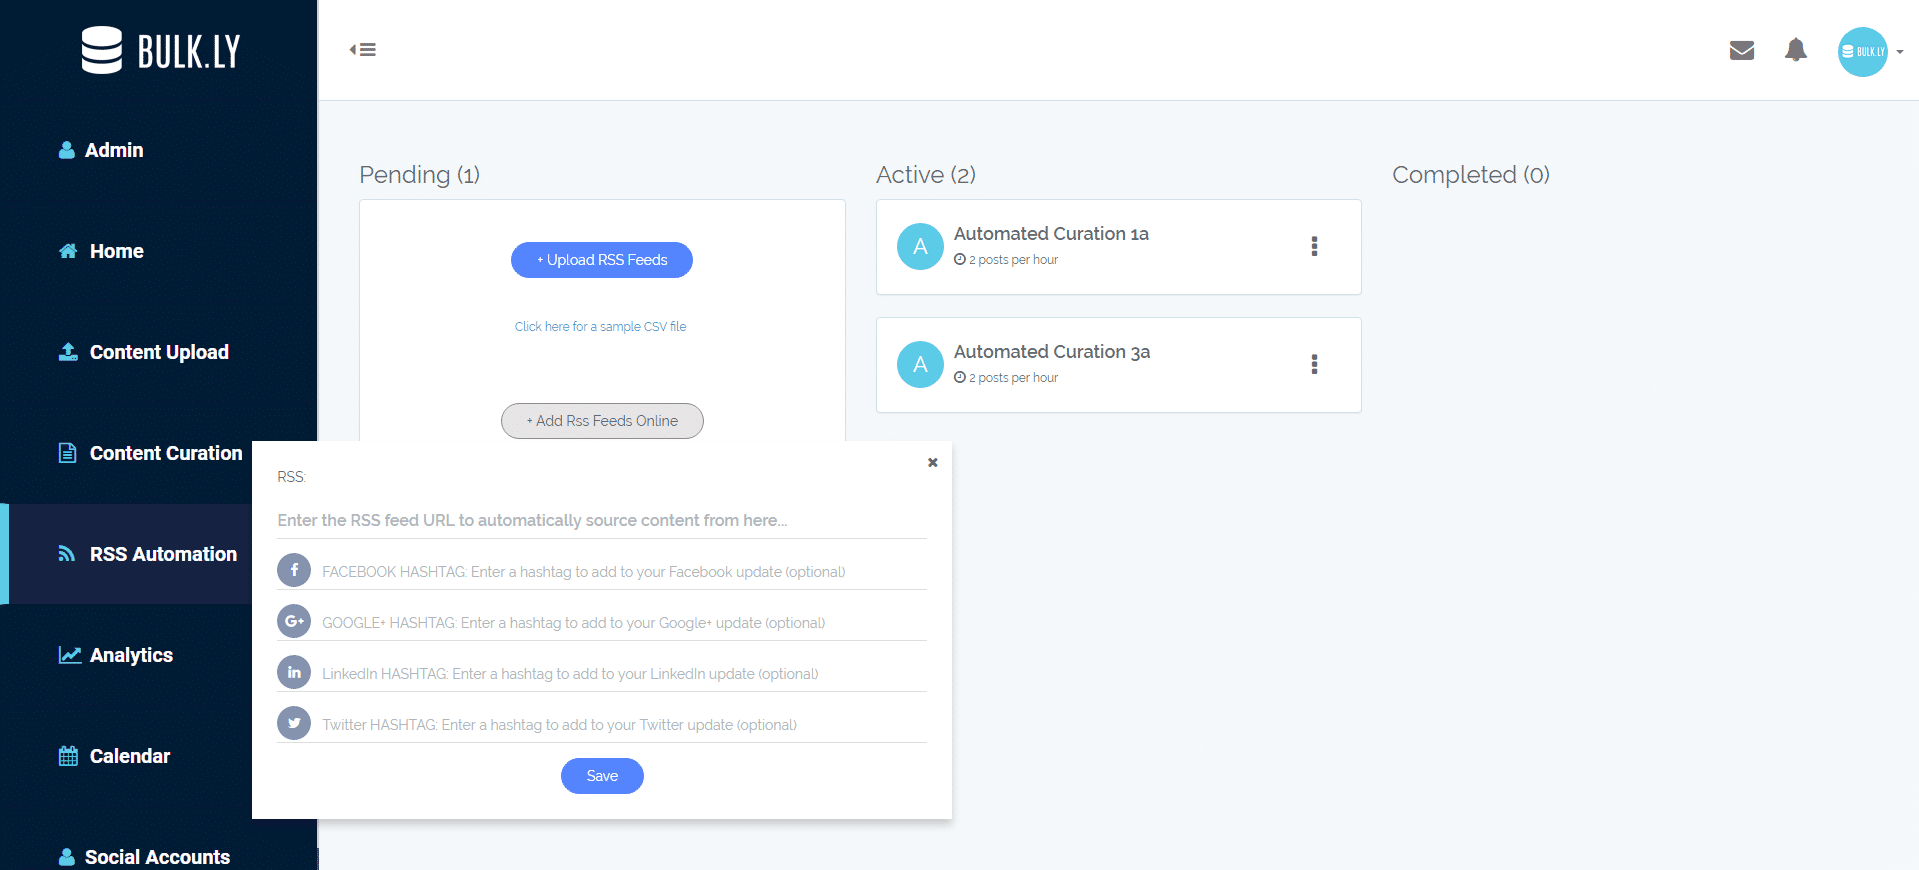
So, click on the “Add RSS Feeds Online” option and you will get this:
Simply enter your RSS URL in the “RSS Feed URL” and then enter any hashtags you want associated with status updates created from this feed URL.
Click save.
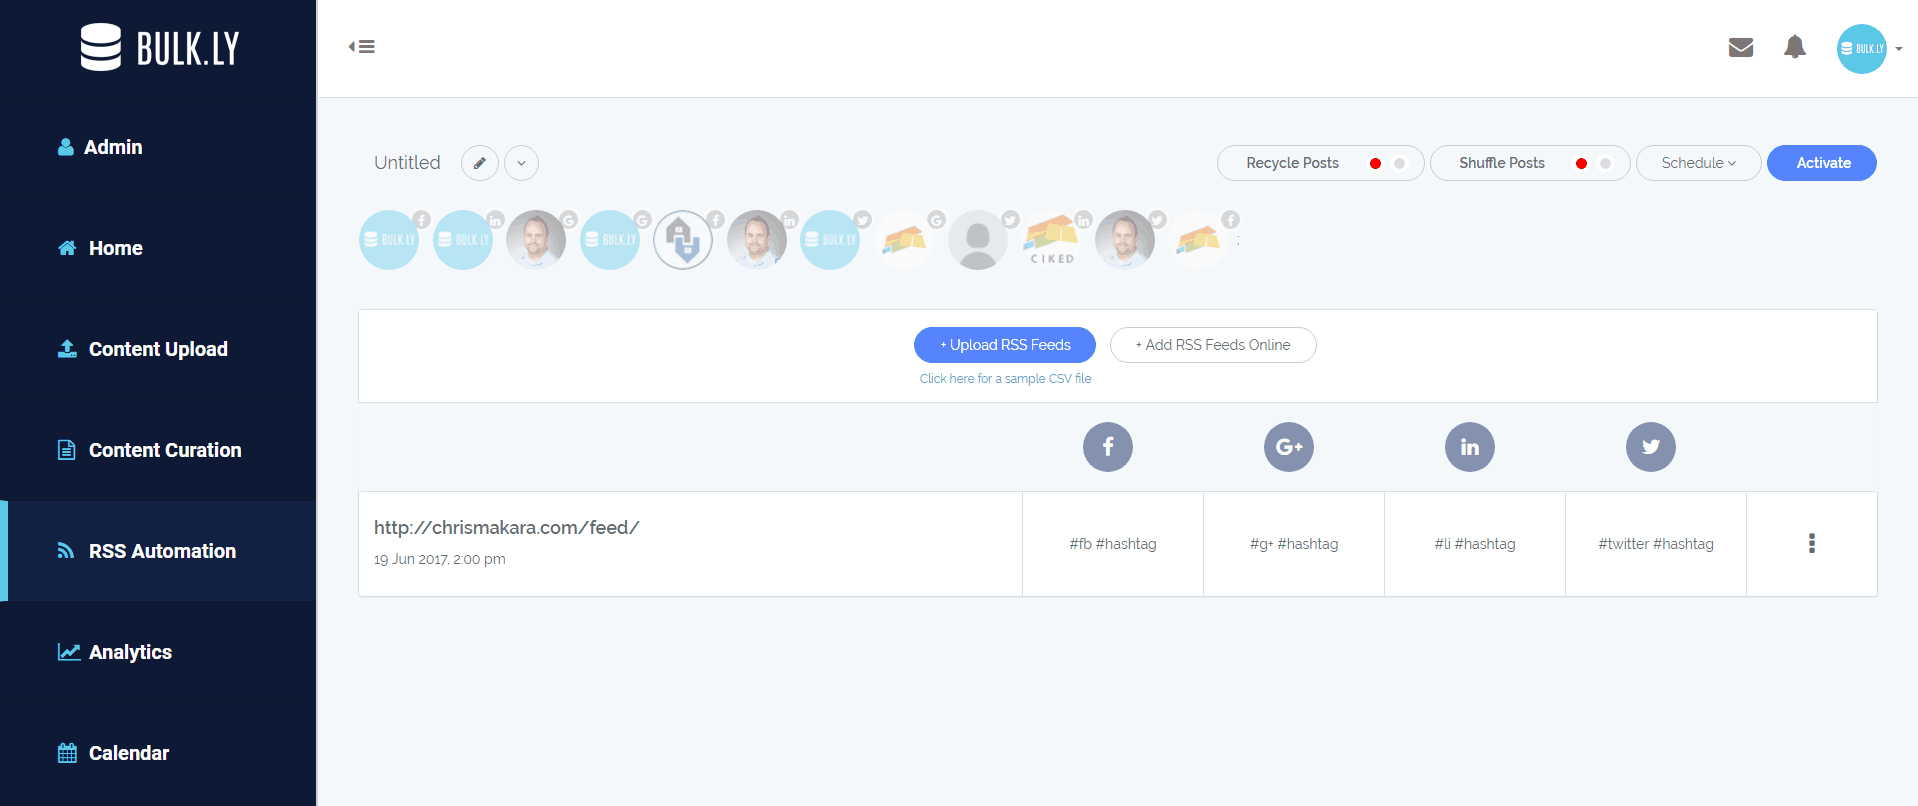
You will then be taken to your pending tab showing the group you just created.
From here you can add hashtags if you want or delete any feeds you decide you don’t want to use.
Then choose the social channels you want these updates sent to and how often. Click “Activate” and you’re good to go.
And if you want to get really granular with your social media updates, you can create groups that are specific to each channel with their own settings.
For example, I have different groups called “Beta Invite” for each social media channel. Within these groups I have URLs with UTM parameters specific to that channel (you are tracking social media, right?) as well as posting frequencies that correlate with my Buffer schedule for that social media account.
The same thing is being applied to my “Bulkly Blog” groups.
This way, I have more organization and control of how often and where my updates get added to Buffer.
In the above screenshot, you will notice the darkened social media icons for each group. This helps to easily see which social media channels are receiving updates from this group without having to drill down into it.
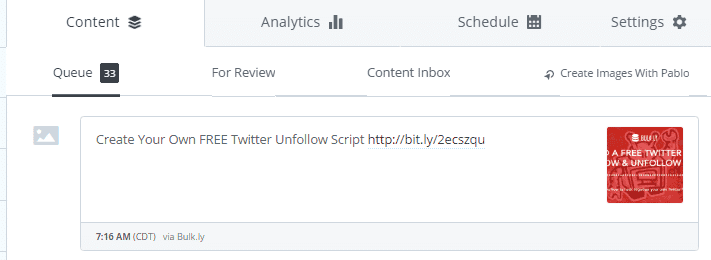
One thing I would like to point out is that you will want to try to balance your scheduling between Buffer and Bulkly. What I mean is that if your Bulkly groups add up to 14 times a day, then in Buffer you want to not have more than 13 times scheduled for posts. If the amount of Buffer posts exceeds what you have listed in Bulkly for that account, then your queue will more than likely be empty at the end of each day.
And no one wants an empty Buffer queue!
[yellowbox]Want to organize and automate your social media posts in Buffer? Be the first to know when Bulkly is ready Click here to be notified. [/yellowbox]
Organizing Your Social Media Posts
There you have it. A genius way to organize your social media updates, not look like a robot, and automate various types of status updates specific to each of your social media channels.
And once your posts are organized, it’s a breeze to jump back into each group and make any tweaks.
I will say that this approach does work best with evergreen social media content since you can set Bulkly to automate it again and again, but don’t let that discourage you from getting organized either way.
How organized are you currently with your social media posts?
What are you currently doing to organize your social media updates?
Are you looking forward to trying out this approach I outlined?
I’m interested in hearing your comments below.
[yellowbox]Want to organize and automate your social media posts in Buffer? Be the first to know when Bulkly is ready Click here to be notified. [/yellowbox]


